Arrangement drainage system Rainway
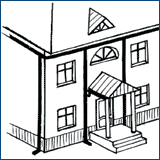 1. Before installing the need to identify the location on the facade of the building drain pipes, taking into account the direction of water drainage, placing the points of ground water catchment and appearance of the facade.
 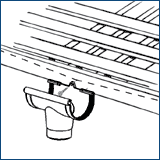 2. In the field organization to establish drainage funnel. Funnel must be in the low points system taking into account the gutter slope of about 2 cm to 10 lm trough.
 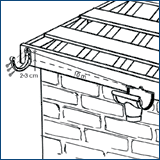 3. With the cord to determine the level of mounting grooves (tilt towards drain) and install it in the higher brackets extreme points of the gutter.
 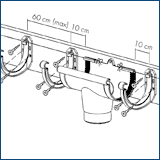 4. Gutter brackets installed on the cord after 60 cm (max), but no more than 10 cm from the edges of craters, couplings and corners.
 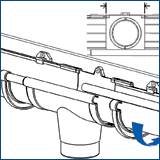 5. Gutters are installed from a funnel. In this case, the edge of the gutter should be at the mark.
 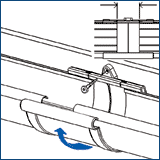 6. The connection grooves worn clutch. The edges of gutters need to be on the level of marks on the clutch.
 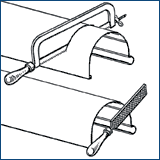 7. For cutting of gutters and pipes used hacksaw. Burrs are cleaned with a file.
 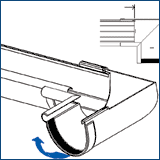 8. Angles troughs are mounted on the same label sleeve.
 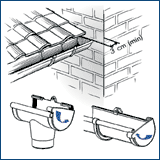 9. At the end of snap caps. The distance from the plug to the side boards to the roof or a neighboring wall not less than 3 cm
 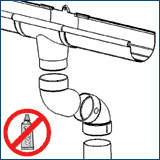 10. Installation of pipes start from the crater. With a slight removal of the roof relative to front wall using the pipe coupling or a combination odnomuftovogo and double box outlets. The arrow on the sleeves and withdrawal indicates the direction of water flow and is always directed downwards.
 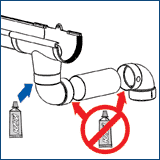 11. With a significant removal of the roof between the double box outlets used the segment tube. In this case, be sure to glue the top outlet to the funnel. Perhaps the use of elbows with an angle of 87 °.
 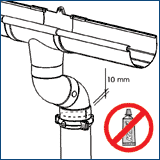 12. Directly under the outlet pipe is installed bracket. If you enter the pipe to leave a gap of about 10 mm to compensate for the linear thermal expansion. Glue is not used.
 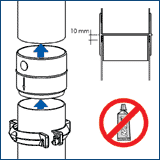 13. Pipe joints used clutch. The arrow on the clutch points in the direction of water flow and is always directed downwards. Under the clutch set crowns "Stein said. The bottom tube is introduced not to the end. The gap of about 10mm. Clay is not used.
 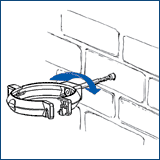 14. Brackets pipe mounted on the wall through universal plugs and special screws.
 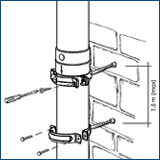 15. The distance between supports should not exceed 1.5 m. For greater reliability is possible to use metal brackets. The distance between them as no more than 1,5 m.
 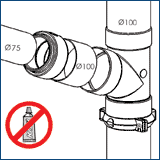 16. Tees are established similarly clutch. In the case of the connection pipe with 75mm pipe 100 mm adapter is used.
 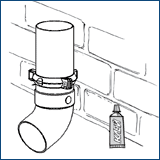 17. The lower outlet is attached to the tube.
 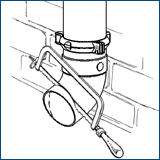 18. Bottom outlet can be cut parallel to the wall to improve the appearance of the system.
Serifikaty drainage system RainWay
Range of drainage system elements RainWay
